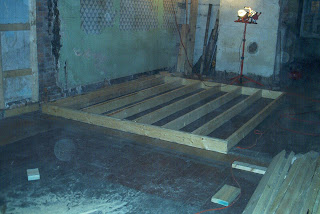
 First, as mentioned before, we blocked in the walls and the ceiling joists in between the furring strips and the ceiling joists where the wet wall was to be located. (We're planning on having the wet wall continue above onto the second floor for the second floor bath as well, to make things easier.)
These blocking areas are to help support the freestanding wall that we are putting in. The blocking will act as nailers and the sucker shouldn't move a millimeter once it's up.
I measured the length of the wall from our floorplans, double checking that we'll have enough room for the kitchen counter tops, double sink, dishwasher, etc... then cut the 2 lengths of 2x6's for the top and the bottom.
I measured each distance from the ceiling joist to the floor, then subtracted 3" for the boards at the top and the bottom of the frame, then I subtracted another quarter of an inch for maneuverability when raising the wall from horizontal to vertical. (You will need that extra 1/4" for room to set it up, otherwise, it won't fit.)
 Then I cut each length and marked each board with its position and the measurement for layout on the floor.
Since the length of the wall was not a multiple of 16" but we needed to have the 16"OC measurements for the drywallers, we just started the measurements from the open end of the wall (the right side in these pictures) and measured in 16" towards the attached wall, then marked both the header board and the footer. Then I lined up each board on the floor and nailed it into place at the top and bottom, according to the 16" mark.
There's an extra 7" space away from the attaching wall where we had leftover space from the last 16" measurement. No problem.
Then we raised the wall up, maneuvered it into placed with a little jostling and kicking, then secured it to a ceiling joist with a single screw.
 Since this wall is going to be attached to a full 2x4 framing wall in the kitchen and we're going to hang kitchen cabinets on both of these walls, it is imperative that these two walls be square with each other in order to avoid shimming and a lot of cursing down the road.
We're already building the framing wall in the kitchen, but I don't have any pictures yet. Maybe it has something to do with that bottle of wine in the last picture... heh heh. Okay, so we toasted our first built wall. It was a long day.
No comments:
Post a Comment