Friday, November 12, 2010

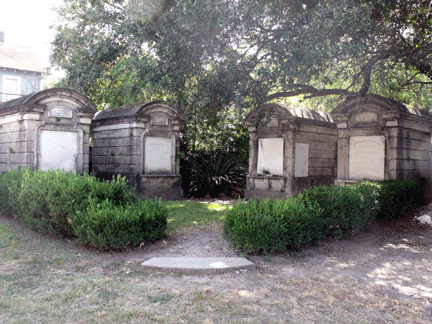
NOLA : Lafayette Cemetary


Just a picturesque walk through dead-ville after breakfast at the Commodore's Palace. Oh, and I'm writing this to remind myself to write about the chandeliers at the CP. Just incredible. It's another post altogether.... I'll get there.

In the meantime, just in case any of you had never been to the Layfayette Cemetery (This is apparently where they filmed "The Vampire Lestat" scene where Louis (Brad Pit) gets bitten by an absolutely horribly cast Lestat.) this is it:

Please note that we were met at the end of our visit by the 'parks & recreation' worker, who, I'm guessing was at the 'nip' a bit early that day. Anyway, he told us that the reason that the graves were above ground was NOT because NOLA was below sea level, but because it was easier and cheaper. This is how the middle class was put to rest.. the upper class were buried just like anyone else.

Oh, and totally new to me.... they apparently bury as many bodies in a tomb as they can possibly muster. Sometimes up to 20-30. They just pack the bones in (ok, I'm guessing here- I never could get a straight answer on how they did this) and carve a new name to the marble nameplate plaque.

Am I the only one who just found this a bit creepy?

Oh, and we were greeted by the feline guardian at the gate:


Had to get a shot of an open tomb: I still don't get it.
Put the recently deceased on the slab then dump the bones into the area underneath?


NOLA still has its problems, even in the graveyard.


People place beads instead of flowers, which I think is just cruel; reminding the dead that they missed another party.


This one was a wallop.

It was for a Children's Home/Orphanage.

People left little plastic toys. It made your throat tighten.


How's this for an unusual juxtaposition:


And back to the tombs.....


Irony.

New Orleans


I had never been to New Orleans.
We fixed that a few weeks ago.

Apparently they have food there. I tell you, I have no idea how people can actually get drunk there with all of the amazing cuisine. And I tried. Many times.

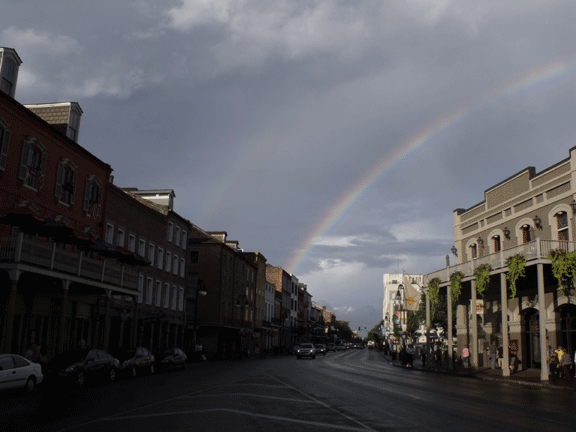
We spent a lot of time just walking around looking at the architecture. I was rather impressed by all of the wrought iron from Covington, Steward Iron Works, etc.

And there was a lot of it.

So I took pictures.


I loved the balconies and the dripping foliage.


Second Best breakfast:


Stanley's: Best Breakfast Ever. (Also the most expensive at a whopping $95)


A real New Orleans Wedding Second Line.


After Katrina, these guys have my humbled respect and awe.


As I go through these, I remind myself of the bad neighbor showing the guests the slides from their vacation.... I'll wrap this up.


But I did want to point out the one thing I just found shocking. The NOLA home security systems. I was reminded that the French Quarter only 5-10 years ago was not a safe place. Not the kind of place you want to walk anywhere alone. At night. Without a loaded gun.

But the cheap innovation of homeowners never fails to impress me. This broken glass embedded front wall is not only very effective, but kinda pretty, too.


On some of the homes, the barbed iron wall toppers did the job. I kinda expected to see some heads stuck on the spikes Monday morning. Yikes.


Oh, and in case any of you were wondering where the coldest beer in the World is... it's in New Orleans,

I have proof:


I think we were there for about 30 minutes before we had the first celebratory beer here. It was the beginning of a fine vacation. Thanks so much to our private tour guide, Joby!!!


Thursday, November 11, 2010

The empty house next door

Well, the house we've been suggesting that someone buy and fix up for two years now, because it was such a great opportunity... just got bought.

For a dollar.

$1


The house around the corner from us just got sold for $180,000. What was it's original purchase price?? Go ahead... guess. I dare you.

Oh, and mortgage rates for a 30 year fixed are ranging near 4.39%. Record lows.

Makes you feel kinda silly for not offering to buy it, don't it?

Tuesday, November 9, 2010

New addition to the family. (Update for Sarah & Sebastian)

Sarah and Sebastian are the wonderful folks who let us take this pile of fur home with us. I'd like to use this spot to once again say thanks, and to update them on how he's doing in his new home.


First of all, he's absolutely wonderful. We have peacock feathers and cat toys strewn all over the place, and he loves them all. He'll herd us down the hallway in order to get us to play with him. And we do, every day. When we can't, he perches in the window and chatters at the birds as they come to the various feeders we have around the second floor windows.

On occasion, he'll charge across the floor, throw himself into the air to land flat against the glass window like a fluffy black version of the old 'Garfield on suction cups' you used to see in the back windows of cars. He's very happy, and so are we. We can't thank you enough.

But he is a handful.

Within hours of bringing him home he started teasing our older cat. He's being playful, but she's just a grouch.

That does not deter him.

We did rename him, although we thought long and hard about keeping the name Guiness. We decided he was such a trouble making prankster, we named him after the Norse God of mischief, "Loki." He's living up to the name.

And he's smart too. Uncommonly so. We're training him to sit and stay, as well as heel.

Send us your email and we'll send you our address for the vet tags. I'd really appreciate them!

Holly[at]RehabOrDie[dot]com

Sunday, October 17, 2010

Central Vacuum System (almost complete)

A few weeks ago I set (threw) my 5 year old standing filtered, bagless vacuum out in the beezeway.

The spring that held the wheels in place has sprung. It escaped. Gone.

This means that the wheels not only did not stay in the correct position when vacuuming, but sometimes they would actually turn around backwards, and become somewhat stubborn. Getting a clean carpet was like trying go get a burro to run sprints. Or even move.

Enough.

We've got a 1/2 mile of cv tubing throughout the house. It was time to put it to work.

I called up Kirkwood Vacuum, in Cincinnati, on Kenwood. I got an answering machine. I left a message. Something about being the easiest ^&%#@^ sale they'll ever make, that my husband owed me, he promised me a CV system and it was about time to pay up. I said call him, tell him his wife said to install the ^^&**@%* thing, and that resistance was futile.

Something like that.

$1000 later, we have a vacuum that can suck a kitten into the basement and not even clog the system. We have 30 feet of tubing, some cool attachments, and most importantly,

a husband


who


vacuums


all


the


time.


Best call I ever made.


Pictures and explanations to come.
.... as soon as he's done with the crevice tool in the den.

Sunday, October 10, 2010

I'm all verKlimt...

White walls. Antique white. Boooooor -ing.

Been that way since we first did our mad dash to paint all the walls with our 5 gallon rented paint sprayer from Home Depot, and got 2 coats on all three stories in under 24 hours almost 2 years ago. (see Dry Wall Finishing & Paint)

I don't know where these ideas come from, but.... I thought about painting a mural over the fireplace in our bedroom. No, not on canvas, right on the wall.

You see, a few months ago I was looking on the internet for some pictures of classic art to print out on 4x6" post it note cards for my dull office 'putty' coloured cabinets. I came across the 'Tree of Life" by Klimt and just loved it. I tucked it in the back of my brain and left it there.


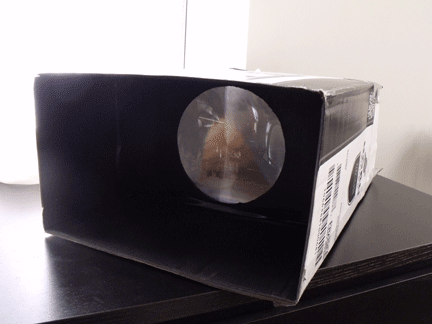
A few months later, I found a projection lens on Ebay. It was cheaper than renting a regular projector, by about $60, but it required some assembly.


It was a bit of a clustermuffin in that you had to find something to use as a projector (like a TV or laptop) and either and turn the projector upside down (because of the inverting properties of the lens, much like the human eye)- or turn the image upside down.

Luckily for me I was just doing a picture so I could invert the image on my laptop instead of turning the whole laptop upside down. Then I had to build a cardboard box frame around it, paint it black inside, tape the box to the front of my laptop screen, then make another focusing frame with the lens on another piece of cardboard, cut a large hole in that (like an iris of the eye), put the iris frame in the box and focus it by moving it back and forth inside the box until the image came out clear on the wall ... Oh, and it could only be done at night. Which of course, made it HARD TO SEE. Yeah, a mess.


Anyway, I finally got it to work, (barely- it wasn't very clear) and I projected the image of the Klimt "Tree of Life" on my wall... not the whole picture, just the tree in the center. I traced it with a pencil on to the 5 foot by 8 foot surface.

Well, I finally took the next steps this weekend... in Acrylic paint. I held a print out of the piece in one hand and just tried copying the colours on to the wall the best I could using a paint brush borrowed from my mother-in-law and a small plastic drawer as a palette. (seeing as I was going to be doing most of this painting on a ladder up 8-10 feet off the ground, I didn't want to spill any thinned paint.


It's a work in progress.


DH's mom, who is a professional artist, overheard I was painting and offered me room in her art studio to work on my project. Now THAT would be interesting. :-)

Also, just found out last night that although DH thought I was nuts for wanting to do this, he never said anything until, well... last night. Funny how sometimes it actually takes LETTING someone do what YOU think is crazy in order for YOU to find out that it's pretty damn cool after all.

More to come.

Sunday, September 26, 2010

Making a see-through window bird feeder

After looking online and through numerous stores for a clear see-through bird feeder I can attach on the outside of my second story window, that didn't cost an arm and a leg, I completely gave up and decided to make my own.

After making a couple rough versions, and making a few mistakes, I think I've got a good one that's worthy of sharing, so here it goes:

Tools required:

*1 sheet of 11x14 (or similar sized sheet) plexiglass. .093m works great- anything thicker is not necessary. ($3.57 at Home Depot)
* four small suction cups ($1.50)
*hot glue gun and glue
* A drill. Preferably a roto-tool or dremmel with a plastic cutting rotary bit (not required, but cool addition to the feeder)
*epoxy glue - I used a 2-part mix that set up in 5 minutes.
*Utility knife with new blade

Take the .093 mil sheet of plastic and draw your layout. I used a temporary vis-a-vis marker, knowing I'd be making adjustments. The cuts are coloured coded to show you the layout better.


The layout above shows the basic dimensions. There is a base/floor piece (dark blue) an orange front piece, a yellow back, two angled sides (green and pink) and an aqua roof.


The first thing I cut was the sides (the pink and green sections above). The cool thing about this project is that the measurements don't need to be all set up in advance; they are adjustable as you go along.

The one key thing is that your side pieces (pink and green) be the exact same size and shape, cut off from one side of the sheet of plastic, and be about 1/3 the width of the sheet. Cut this piece first.

With the .093 m sheet, I used a straight edge, used a new blade in my utility knife, pressing hard into the plastic, scoring it about 15 times. Then I turned the sheet over, made a couple of passes on the other side just for luck, then snapped the piece off with my hands.

BTW: I tried this with a thicker piece of plastic and it muffed up the whole thing, cracking way off the line. I would NOT use anything thicker than .093.


Once the side piece is cut, you need to use the width of it to determine the size of the base (or floor) of the feeder. Turn the side piece sideways and use it to make and then cut the base (dark blue) piece.

Then cut an angle across the center of the side piece (to separate the pink piece from the green piece). It is important to measure carefully here so that the angles are the same for each piece once they are cut.

e.g. on a 14"x 4" long piece, draw a line from a mark made at 8" from the bottom of the left side of the plastic piece to a mark made 6"from the bottom on the other, so that the diagonal will be the same on each piece. Since these will both be set on the left and right sides, they need to be equal in size to hold the base and the roof together. (6+8=14; both pieces will match.)


Then cut the roof. It should be bigger than the base, and be slightly larger than the length of the diagonal you cut for the two side pieces.

Here I used the two angled pieces to make my marks, and used a straightedge to make my line and my cut with the utility knife.


Once the base is cut and the roof is cut, the only thing left to determine is how deep you want your feeder to be.

After a few tries, I've noted that a 4" feeder is just too deep. It freaks out the birds to have to get inside it. I settled on 1 3/4" deep and the finches and chickadees seem to like it.

So of the remaining plastic, cut off a strip to go across the front of the feeder any where from 1-2".

The remaining piece will be the back piece.


Reassembled, you get the gist of what we're about to make. They are labeled above, from top left down to bottom left: Roof, front, backing, base (with holes marked out for drainage) and on the right are the 2 side pieces.


After everything is cut out, remove the plastic coating from each side.

The next thing to consider is what size of birds you want to invite to dinner.


If you do not have a dremmel or rotary tool that can cut through plastic, you can skip this part.

I originally thought I wanted bigger holes cut ion the sides to that the birds could have access on three sides instead of just one.

DH suggested I keep the size down in order to keep the bigger birds from pushing out the titmice, chickadees and finches. Blue jays and Cardinals can be pushy.

So I reduced the side of the openings to small rectangles.

It's important to make sure that if you're cutting holes in the side pieces that the bottom edge of the cut hole be the same height as the front panel. In my case, the lowest edge of the cut hole is 1 3/4" from the bottom edge.


I took these outside, because they make such a plastic shardy-mess, and did the cutting there. I also drilled holes in the base piece for drainage.

Do not skip the drain holes. If you do, after the first rain you'll get some sprouts instead of birds.

Then the assembly:

I heated up the glue gun and ran a thin line across the back of the base, then attached the back piece at a 90 degree angle, using the corner of a side piece to make sure I had a good 90 degree angle as the glue set.

Then I attached the front piece, and then glued in the sides.


Then I glued the roof on the top, one side at a time-- no need to try to do both at the same time, just make sure that when you put the first edge into the glue that the other side lines up on the roof line. The glue will stay flexible for a while. Then glue the other side once the first side has set.


Then glue on the suction cups. DO NOT use the glue gun for this. I did that on my first feeder and as soon as the sun hit it after a chilly morning, the glue popped out of the suction cups and the feeder fell to its demise.

Use a 2 part flexible epoxy and glue those suckers on good.

Then, given 'em all a good lick, fill it with bird food (Black oil sunflower is a winner) and stick it to the outside of your window.


And the birdwatching and entertainment ensues.... all kinds of entertainment. :-)


Here you can see the first feeder I made. Not as impressive and not as sturdy, also missing a roof. Hence the newer model.


Also note my biggest fan. A real admirer of my work.


One recommendation I got from the guy at the local hardware store was to cover the lower window with window tinting or mirror tinting so that the birds can't see inside at all. I like the idea, but half the fun is watching the excitement of the cat-bird interaction.

After a while the birds realize he can't get them, and he resorts to merely 'chirping' at them in soulful desire and angst.

I'm gonna make more.
Maybe as gifts....

Friday, September 24, 2010

Recipe: Mark's Sage Chicken

Mark's Sage Hen

(I know, how wise can it be if it's dinner...)

This is REALLY, really good, and relatively simple (despite the tedious-looking instructions--it's really just "put garlic and sage under the skin, oil and season"). The clean up is pretty simple, too, if you deglaze the skillet.

For the Chicken:

  • 1 Fryer
  • 1 lemon
  • generous salt and pepper
  • 2 large sprigs fresh sage (about 16 leaves)
  • 5 large cloves garlic
  • 1 T. olive oil
  • 2 cups unsalted chicken stock (preferably homemade)
  • 3 T. white wine or vermouth

Bring the chicken up closer to room temperature by leaving it (wrapped) on the counter for 1-2 hours (no more). Pre-heat the oven to 350 degrees. Rinse and dry your bird (any size will do, really, just adjust the time up or down a bit with size). Peel and halve the garlic cloves. In a skillet (something that will take fond), add a little olive oil and then add your bird, breast down and add a little olive oil, rubbing into the skin. Sprinkle salt and pepper on the back of the bird, then inside. Then turn the bird breast side up and add a bit more oil, making sure the breast is well oiled, then salt and pepper. Loosen the skin around the breast so that you can slide a finger under the skin and then around the outside of the legs. Slide 1 or two half cloves of garlic along with 2 safe leaves under the skin of each leg and thigh, and then slide 2-3 cloves and 3-4 sage leaves under the skin of each side of the breast.

Put the remaining sage and garlic into the cavity and then, with a fork, poke the lemon several times, over the chicken until it will drip a little juice and spritz some of the lemon oil onto the bird. Put the lemon in the cavity. Tie the legs with cotton twine. Place skillet and bird inside the pre-heated oven. Set your timer for 1 hr. 45 minutes.

Meanwhile, clean and rinse your green beans.

For the green beans

  • salt and pepper to taste
  • 1 T. unsalted butter
  • 3 cloves chopped (not minced!) fresh garlic

When the timer goes off, check the bird. It should be golden brown and the leg should move easily. If it's not ready, give it another 15 minutes or so. When done, pull the skillet out and let it cool just a bit (1-2 minutes to reduce spattering grease) on the stove. Carefully move the bid to the cutting board and tent with foil. I use a sturdy spatula and tongs to move the bird, which helps me not leave any skin in the pan.

Pour off as much of the fat as possible and then put the skillet over medium high heat. Add the wine, simmer, and scrape some of the bits off the bottom of the pan. Add the stock and bring back to a simmer and reduce to roughly four tablespoons.

Meanwhile, in a large non-stick skillet, melt butter and add chopped garlic. As soon as it's just lightly browned, add the green beans and a bit of salt and pepper to taste. Toss or stir to coat and saute the beans for 1 minute, then toss again, repeating this process 3 more times. Reduce heat to medium. Toss occasionally to brown some of the beans and to make sure all are tender. Pre-heat your plates.

When your sauce has reduced (about 6 minutes) your green beans should be done. Turn the heat down on both and carve your bird. If the bird is small enough, I'll often just halve it. You can either sauce the plate and place the chicken on it, keeping the skin crispier, or spoon the sauce over the chicken. Next, plate the green beans, making sure to get the garlic nubblies as well as the beans.

I can usually skip the starch, but there's a strong argument for a bit of polenta here, if only to soak up any left over sauce. If you were to add a little sauteed leek, I suspect that your guests wouldn't hate you for it.

A Pinot Noir, or even a Primativo pairs well with this, but really many lighter reds or dry whites (Pinot Grigio comes to mind) will do well.

A note on the chicken and the stock:

Firstly, the fresher and less factory raised your bird, the better. I buy mine from a small grocer that sources his from Tewes Poultry just 5 miles south of me. The results are very worth while. Also, it really helps to keep the breast moist, while getting the thighs tender if the cooking is gentle and even. This is why I let the bird sit out for an hour or two and only cook it at 350'. Chicken stock can actually make or break this dish. Cheap, salty broth is not good. The best is homemade, with chicken feet, backs and necks. The mouth-feel of a sauce made with this stock is unmistakably velvety and rich without being heavy. Trust me, it is well worth the effort of making and freezing a large batch of stock some weekend.

Tuesday, September 21, 2010

Things You Wish You'd Done


We've been doing a bit of trim and finish work over the past few months and it brings home some things that I wish I had been much more focused on. Primarily, framing.

It's clear to me now that in addition to framing for your drywaller, you also need to frame with your trim and your floor and your cabinets in mind.

What's that mean?

First, use straight, solid lumber anywhere that it's going to be creating a key nailing surface for trim.

Early on, when we were furring the walls out, we used a few inferior 2x4's that torqued out from the wall a bit in a few places. You don't notice this so much when you're working. Alas, after you spray with foam (immobilizing the 2x4), and then drywall over it, you sure do notice that the gypsum board protrudes 1/2" past the outside edge of the door jamb (you "fix" this by cutting back the gypsum board as much as you can and still hide it with trim.). You also do notice this in the corners where you have a funny gap where the tiles are square but the wall is not and the trim doesn't cover it. Which brings me to the second reminder...

Make sure your walls are square and plumb. Yes, you may have to get out the cat's paw and re-nail a 2x4, but it's worth it. This is ESPECIALLY true in bathrooms and kitchens or anyplace where you are tiling. Believe me. Here's a tip: An uncut corner piece of OSB can give you a pretty good read on square, if you don't have a framing square handy...and even if you do.

And while we're talking about "square and plumb", anywhere that you may be hanging cabinets or installing counters, you really also want your walls to be straight. You do not want some 2x4's bowing out into the room while others bow out of the room. That makes it hard to make a counter look right and to hang cabinets. A nice straight piece of OSB can help with the straight. I'd not worry too much about any irregularities down low in a kitchen space where it will be hidden by cabinets, nor up high. At counter and eye height, however, pay extra attention. Also make sure that you don't have any warping of the vertical framing members. You'll be looking for those when screwing cleats or cabinets to the wall.

And while we're talking about screwing cleats to the wall, let's talk about nailing surfaces. What about nailing surfaces? We like 'em, that's what. Lots of them. Especially in corners. Floors can bow, but you can bend trim a bit to accommodate this. Of course, if you can't find anything to nail the trim to, you're not going to bend it. Also, when you're trying to get good looking joints, you need the trim to be solidly nailed. You can't just nail into drywall and expect the trim to stay put. So, before you put away the pneumatic nailer, grab lots of scrap lumber and make sure every corner has lots of additional spacers and/or nailing blocks so that there's a nice big nailing surface at floor trim level. If the floor is funky or badly uneven, add a nailer on the sole plate too. Sometimes it's hard to get a good nailing angle.

And while we're adding blocks, make sure you also think about where cabinets may be hung or where you may be hanging shelves or perhaps even a grab bar (around a tub?). Put some additional blocking and nailing blocks at strategic locations. That will both make it much easier to secure loads to the wall later, but also stiffen the wall.

I'm not saying we had a whole lot of screw-ups, but when you're installing trim, or counters or cabinets, you're going to experience all of them. There are always work-arounds, but some are harder than others and regardless, framing screw ups can kill momentum, and make a relatively easy job take much longer.


More tips on framing HERE.

Thursday, August 19, 2010

Thank you, Officer Hoyle


And I thought Mondays were tough.

This morning, I drive to the end of my street, which is a one way street, and there is a tireless stop sign, dutifully protecting us all from the onslaught of traffic speeding its way north at the intersection closest my home.

Not uncommon to see drivers unaware that there is an intersection before them until it is too
late, we get a lot of close calls. C-L-O-S-E M*^%$@*F*^$%#@ calls, I say.


Some closer than others. Note that the impact to this SUV at this very intersection knocked the entire wheel off of the SUV. They frequently come up on this intersection from the South too FAST.


My problem is that the road is bent in such a manner that as you come to the intersection from the East, your view to the South is, well... not there. The building on the Southeast corner comes right up to the road, just a couple of feet of sidewalk there.

In order to actually see any cars coming from that direction, you have to inch your car's nose out into traffic about 20 feet past the stop sign in order to see anything. And even then, you're taking your life in your own hands.

This is where a lot of those close calls come from.

sneak... sneak...... sneeeeeeeeeeeaaaak.... W!H%AMMO!


zoom
zoom
zoom


So I'm guessing when the police officer saw me inch out into the street, trying desperately not to be T-boned by a Mack truck or a TANK Bus, he thought he saw me rolling through a stop sign.

I'm sure that warranted the U turn in the middle of traffic. I'm sure of it.

I'm dangerous that way.
Rolling stops in a devious attempt not to become a mangled comatose burden on society.

Evil, I am. Pure evil.


So as I see it the only way to actually SEE a car coming from the South is to:
1. Inch out into traffic and hope to Galt that the oncoming vehicle is not going to ram you at 50mph, because you'll only have about 2 seconds to avoid that deathtrap... or

2. BUY A G$@#D*^#@ CONVEX MIRROR TO HANG ON THE POST ACROSS THE STREET LIKE I ASKED THE TRAFFIC TECHNICIAN TO DO LAST YEAR. COME ON!!
So thank you Officer Hoyle, for 1.) reminding me that the insurance card in my wallet is out of date, and 2.) reminding me to get back on my fight to get a mirror at this intersection, and 3.) for giving me the traffic technician's direct line.

I have a call to make.


Wednesday, August 18, 2010

Will work for wood?


The hubby just had another birthday recently, and although we haven't had a lot of time to spend with the folks lately, they were generous enough to give him the gift of a new electric smoker.

This is the kind that plugs in outside, you can add water and/or wood chips ... and Oh oh oh.... before I forget-- if anyone local has some apple wood chips or chunks, we can trade a smoked chicken or some such wheelin' and dealin' for the wood. The trade will be worth it, guaranteed.)


Seriously, I need the wood.
I'll be out front of the house with a sign.
You won't be able to miss me.


So anyway, DH starts putting the smoker together, and suddenly some familiar feeling comes over me... like I've seen this all before... a long long time ago... in a galaxy far away....