Tuesday, November 8, 2011

Country Ribs with Apples and Roasted Root Vegetables


This recipe is my own creation. It's really very easy and the flavors are both complex and comforting. The end result is comfort food that's not totally over-the-top. Country ribs aren't actually ribs, but rather a cut of blade steak or similar. They're both cheap and exquisite when slow cooked or braised. I used both a saute' pan and a chef's pan for this dish rather than a large roaster and I found both cooking and clean up to be much easier. Basically, you want a larger skillet for vegetables and a smaller, stove-top-safe pan for the pork.
Total cooking time 2 hours, 30 minutes. Active cooking time about 30 minutes.
Serves 2

Ingredients
2 large "country" ribs (I selected slightly thicker cut "ribs")
3 medium parsnips, peeled, cut into 3" pieces

2 large carrots, peeled, cut into 3" pieces

1 large onion, peeled, cut into 2" wedges

1 winesap apple (or granny smith), cored and cut into 6 wedges

4 small sprigs fresh rosemary

1/2 cup dry white wine

12 oz. home made chicken stock, divided

salt and pepper, to taste

1 tsp arrowroot in 3T water, stock or white wine.

3T olive oil


Pre-heat the oven to 350'F. Lightly oil both pans. Salt and pepper the country ribs and place bone-side down (if there is a bone side), or with the fattiest side up in the smaller pan. Arrange the rosemary on, under and around the pork. Place a few of the carrot, parsnip, and onion pieces around the pork. Add white wine and about 6 ounces of chicken stock to the pan. Heat on the stove until the liquid is hot and then place in the oven. Set your timer for 1 hour.
Toss the remaining vegetables with oil, salt, and pepper in the saute' pan. Lightly oil the apple wedges. When the timer goes off, add the apples to the pork pan, turn the pork, and place on the top rack. Place the vegetable pan on the bottom rack. Set the timer for 1/2 hour and increase the temperature to 375'. After 30 minutes, toss the vegetables so that they brown evenly, and turn the pork again. Return to oven and increase temperature to 425'. Set timer for another 30 minutes (Note: the timing is not critical. The idea is to move the meat and vegetables around so that they brown evenly and/or stay moist. I just find that the timer helps keep me on task so I don't forget).

Warm the plates (I use the microwave for 2 minutes). When the pork and vegetables are done remove pans from the oven. Keep the vegetables in the pan to stay warm. Place the pork pan on a burner and place the country ribs on plates along with the cooked apples and vegetables that were with the pork. There may be some sticking. Plate what you can, leave what you can't. Pour or spoon off any excess fat. Turn the heat up to high-medium and add the remaining stock. Bring to a boil and scrape the bottom of the pan loosening any brown bits and remaining apple or vegetable pieces. When the stock has reduced to about 6 tablespoons (about 5 minutes), add the arrowroot slurry. Stir and simmer for 10 seconds.

Plate the remaining vegetables and spoon the sauce around the pork.
Serve with a fruity zinfandel or Pinot Noir.

(BTW, if you are new to this blog, we have a fairly robust collection of recipes interspersed with our how-to projects. Find them here.

Monday, October 31, 2011

Replacing Bricks and Pointing


Strangely, I'm feeling a Pink Floyd moment coming on...

Actually, this weekend was a chance to REALLY get my brain around the mortar, pointing up, and historically appropriate mortar thing.

See, we had some deteriorating bricks on the un-painted side of the house and we were thinking that we needed to get on the worst of those bricks. You can see one of the ones I left un-done this weekend below.


Why did I leave that poor "water damaged" brick when I was right there working on two others? Well, I'll tell you why. Those bricks are TOUGH. I mean, HARD. SOUND. You'd think that a spalled brick such as that would have been soft and crumbly. You'd be wrong. There was damned little wrong with the bricks that they built this house from.

So what was with those deteriorated brick? Mortar. HARD mortar. HARD to chisel out.

Mortar used to be sacrificial. That is, it was meant to to fail before the brick does. Mortar is easy to replace. Brick is not so easy to replace. An old brick home is designed to aspirate an water that gets in. BUT water, brick, and mortar expand and contract at different rates as we go through freeze-thaw-freeze-thaw cycles.

So what happened, as far as I can tell, is that some time long ago, maybe 40, 50, or even 60 years ago, someone did a bunch of brick work and really packed the mortar in around these bricks. And they used very hard mortar. As a result, when the brick got moist and then froze, there wasn't any place for it to expand to, and so the front of the brick cracked and then crumbled.

That's the bad news. The good news is that a lot of those bricks look bad but are just fine--very hard and sound. Of course, if I care about how they look, then I've got a very tough task ahead of me if they are all as sound as these three were. I spent 4 hours cutting out 3 bricks and replacing them. I hit my hand with a brick hammer at least 2 dozen times. I can bring in a hammer drill, and I will, I suppose, but this task is not the cake-walk I expected.

In any case, onward. So we don't have this problem again in the future, I made doubly sure that my mortar was soft enough. I came to the conclusion that my prior mix was still way too hard for what I want to do. The trick is to use less than 20% portland vs. your portland+lime mix. Here's what I used:

1 Part Type N Mortar
2 1/2 Parts Lime
5 Parts Sand
Dye to taste


Why dye? Well, lime and Type N are both rather grey. This doesn't look much like the existing mortar and is thus unaesthetic. A little bit of putty colored concrete dye really makes the mortar almost invisible and if you use sand that is close to what is already there, it completes the illusion.

So, here's the step by step.

To replace bricks

1) chisel out as much mortar as you can,
2) using a small or even pointed chisel, break the brick and pry out pieces.
3) chisel out any remaining mortar and make sure the cavity is clean and sound.
4) size the cavity vs. the replacement brick. All bricks are not the same size.
5) either spray the brick with water or use a wetter mortar mix--those bricks suck up water.
6) don't over-pack the cavity with mortar. You want to seal the brick in, but you don't really want mortar between the inside and the outside course of bricks. It's Ok to leave a pretty good air pocket behind the mortar and the brick.
7) smooth the mortar with a pointing trowel. If you need to, you can lightly spray the mortar with water to create a neat finish.
8)After the mortar sets for a bit, come back with a brush and a spray bottle and knock off any excess mortar on the face of the brick.

The tools I used were a standard triangular trowel, a pointing trowel, and a rectangular trowel. The latter was best for mixing mortar in the bucket. The pointing trowel was great for getting into the gap between the bricks and for pushing mortar off the triangular trowel and into the wall.

One last tip: if you are pointing, start someplace that's hard to see. You'll be messier when you start, and will get better as you go.

Wednesday, October 19, 2011

Update: It's Been Too Long

It has been too long since our last real renovation/DIY update. We're sorry about that. Regular work makes for less time, but also, we're so used to "doing things" that we're usually done before we realize that we should have taken a shot or two and written a blog post.

We'll try to do a bit better. At this point, much of what we are doing is repairs and redecorating. Redecorating was about the last thing on our minds for the past several years, but a couple months ago, Mrs. OrDie says to me, "You know those color codes I told you about?"

"Yeah..."

"Red means Beef. Blue means chicken. Pink means intestines/stomach. Antique white, however, means 'RENTAL'."

"Uh-oh!"

"Yep. We're putting some color in this place..."

And so it went. It's not as easy for people like us as you'd think, but so far, we've got our living room painted a neat warm color "Mississippi Mud", and the guest bath is a bright cranberry red. Both are huge improvements, though both took a whole lot of samples and sample painting to get right.

We'll try to get a post up on color selection and painting tips next week. With some luck, we'll have a post regarding the completion of the bedroom mural soon after that.

In the mean time, DIY'ers might want to check out the Rehabbers' Manual (scroll down to the first installment to go through them in order). Or just browse back through the blog. We came a long way and have a lot of good stuff up in past postings.

Recipe: Gorgonzola Bunny

(photo courtesy of MaslowskiWildlife.com)

Last night, we enjoyed this wondeful dish during an extended power outage. It is even better with candle light on a cold blustery night.

Gorgonzola Bunny
(takes 1/2 hour to prep, and 2-2 1/2 hours to cook.) For 4 people:

2 large rabbits
2 T Tarragon, divided
1 cup flour
ample salt and pepper to taste
2 T olive oil (as needed)


2 cloves garlic, peeled and whole
2 bay leaves
3-4 springs of fresh thyme
2-3 onions (based upon taste and size/room)
2 large turnips
3/4 lb carrots (less or more to taste)
2 cups Chicken broth (enough to cover--best quality made with feet*)
1 cup of dry white wine.
1/3 lb Gorgonzola (Italian is better, if it's not really sharp, try Danish Blue instead)
Fresh Tarragon for garnish or to add to sauce (optional)


First, bone the rabbit. I separate the back legs and then simply cut the meat off each in as large pieces as possible. Then I cut the meat from the front legs, and slice the saddle off both sides. I then cut the loins off by running a sharp blade down either side of the back bone. This is tricky and a bit like filleting fish, pulling the meat out with your thumb and scraping along the spine and ribs with the knife. It's worth the effort however. If you don't feel comfortable doing this, you can cut the whole loin section apart from the ribs and worry about pulling the meat once it's cooked. If you REALLY don't want to bone the rabbit at all, you can have the butcher cut it into pieces, but your guests will have to eat the meat from the bone and some may be squeamish.

Once boned, dredge the rabbit pieces in flour seasoned with 1/2 of the tarragon and ample salt and pepper. lightly brown in a non-stick pan and place in your dutch oven or covered pan. I like to add a half tablespoon of the seasoned flour to the pan with a little more olive oil, to cook for a few minutes. This will act as a thickening agent. De-glaze pan with wine and a bit of stock and pour into the dutch oven with the rabbit pieces.

Peel and coarsely chop the carrot, onion, and turnips. Add to the pot with the rabbit. Add remaining tarragon, thyme, garlic, and bay leaves. Cover with best quality chicken stock, bring to a simmer, and then place in a 350' oven for 1 1/2 hours. Add about 1/3 of the Gorgonzola to the pot, in small pieces. Return the pot to the oven for another 10 minutes or so.

Serve on plates or wide bowls. Arrange the rabbit and vegetables so that you can place small pieces of Gorgonzola on each bit of rabbit. Pour hot broth from the pot over the pieces of rabbit so that it melts the Gorgonzola into a glaze. Serve with a nice pinot noir and a salad of bitter greens with a Dijon vinaigrette.

Note 1: if you bring the sauce back to a simmer it will help the Gorgonzola melt when you pour the sauce over the rabbit. Note 2: on herbs, I've found that one can omit the thyme without much ill effect and if you don't have fresh, don't add thyme at all. Also, the tarragon need not be fresh. Dried seems to work quite well and should not be omitted.

*chicken feet are available at better poultry sellers. They impart a velvety mouth feel to stock and hence the sauces made from the stock. If feet are unavailable when you are making chicken stock, you can come fairly close by including a generous number of chicken breast bones along with backs and necks.

Monday, August 1, 2011

Flageolets Salad with Goat Cheese and Bread

This is a very nice, complex, satisfying salad and it's very good for you too. Adapted from an old Bon Appetite recipe and something I read on the splendid table.
Flageolets Salad with Goat Cheese and Bread
(serves 4)
Beans
  • 1 cup flageolets or other white bean (flageolets are best, trust me), soaked in cold water overnight
  • 2 bay leaves
  • 1 yellow onion, halved
  • 1 rib celery
  • 1 carrot, halved
  • 2-4 sprigs parsley
  • Water to cover
  • Salt and pepper to taste
Drain the beans and place them in a covered pot with the onion, bay, celery, carrot, and parsley. Cover with water by 2" and cook 2 hours. Drain and reserve 1 cup of the cooking liquid. You can do this days in advance and just keep the beans in the fridge.
  • Herb Dressing and Salad:
  • 2 1/2 tablespoons fruity extra-virgin olive oil
  • 2 garlic cloves, minced
  • 1/2 teaspoon finely chopped rosemary
  • 1 teaspoon finely chopped thyme
  • 1 cup Cerignola olives, cut from the pits
  • 4 tablespoons chopped fresh flat-leaf parsley
  • 4 large fresh basil leaves, chopped or torn
  • 2 to 3 tablespoons fresh lemon juice
  • Salt and pepper to taste
  • 1 clamshell fresh field greens
The dressing is for both the beans and for the salad. To make the dressing, whisk the 2 T. EVOO and 1 T. of lemon juice together. Add the garlic, rosemary, thyme, and half the parsley and whisk in. Taste for balance and adjust with more olive oil or lemon. Toss half of the dressing with the greens and Cerignola olives.
To finish the beans, in a small skillet, a heat the remaining dressing for a few minutes, until the herbs and garlic sizzle a bit. Add the bean cooking liquid and the beans, increase the heat to high, and boil for 30 seconds or until warmed through, then simmer until the liquid is absorbed. Add the remaining lemon and remaining olive oil, if any and salt and pepper to taste.
Arrange the greens on plates, and mound a half cup of beans atop. Scatter the remaining parsley and basil over the salad. Serve with fresh goat cheese on toasted French or Italian bread. Garnish with a sprig of fresh rosemary.

Bachelor's Blackened Chicken Salad

Those who know me, know that virtually all my cooking is from scratch, especially sauces and dressings. Not this one. This dinner is super fast, and super simple. I use the mildly sexist term "Bachelor" as a metaphor anyone who has limited time for or interest in cooking and who's cooking skills pretty much end at the grill

This is a perfect summer dinner with a lot of flavor, and not too many calories. Prep time should be less than 30 minutes


Feeds two.

Ingredients

1 t. paprika (use a bit more if sweet, less if hot)
2+ t. salt
1 t. garlic powder
1/2 t. cayenne pepper (more or less to taste)
1 t. black pepper
1/2 t. dried thyme
1 t. dried oregano
1 split (i.e. both halves!) boneless, skinless Chicken breast.

1 summer tomato, wedged or 2 "Campari" tomatoes out of season.
1 head romaine (fresh from the garden is great, but hearts from the store are fine).
4T. Best quality jarred blue cheese dressing (or to taste).
1t. red wine vinegar

Start the fire. It should be hot and on one side of grill (a.k.a. "indirect grilling method"). Mix the spices together with a fork on a large plate. Lightly salt the then coat the chicken breast with the blackening rub. Be generous. Tip: If the chicken breasts are quite large, or if you have very little time, cover with plastic wrap on a cutting board and pound down to a uniform 3/4" thickness.

Quick version: Grill the chicken until done.

Long version: Grill the chicken over direct fire for 3-4 minutes on one side, then turn and grill another 3-4 minutes. The breasts should be just barely charred. If they are firm to the touch, move off the fire or even off the grill to a warm plate. If the chicken is still resilient to the touch, turn and move just off the fire, and grill indirectly for another 3 minutes. If firm, move to a warm plate to rest. If not, turn and repeat until done. A pounded, thin breast will grill much more quickly. A very cold, large breast is going to take more time. Don't rush it.

While the chicken is resting, arrange your lettuce and tomatoes on the plates. Drizzle with the vinegar and the blue cheese dressing. Slice the chicken breasts across the grain and plate atop the lettuce. Serve.

Serve with a pinot noir or any red that can handle spice. I suspect that a vino verde will work well for white wine fans.

Wednesday, June 1, 2011

Historic Preservation


As many may know, our little river city (like many cities) is dealing with some serious budget issues. Thus, many folks are discussing places to save money. As part of one of these discussions, it was suggested that Covington get rid of it's historic preservation officer and have those duties be taken over by Code Enforcement.

This is a horrifyingly bad idea.

First off, and let me be clear about this, I love our code enforcement folks--at least those I've met and have dealt with, past and present. That said, those guys are busy enough as it is. It's unlikely that they have the skill sets necessary to promote and ensure historic preservation and it's unlikely that they'll have time to acquire the skill sets--they're busy enforcing the code and trying to keep Covington livable and safe. But let's assume that these guys, somehow, could find the time and energy to get up to speed on all the historic districts, the preservation briefs, federal requirements, national historic register requirements, resources and best practices (etc., etc.). Historic preservation is a full time job. If the officer misses a beat, a treasure can be lost. For good. The thing is, code enforcement guys get busy, especially at certain times of the year. Some of what they do is a matter of life and death, too. They cannot and should not make historic preservation their first priority when lives are at stake. This makes historic preservation duties and code enforcement duties incompatible--even in the artificially optimistic construct that I created here.

Now, some might say, "But is that level of concern about historic preservation even warranted? In times of tight budgets, can we really afford the luxury of historic preservation?"

The answer is this: Yes, indeed, concern for our historic housing and building stocks is even MORE important now. In fact, we can't afford NOT to have a dedicated historic preservation officer.

In times of tight budgets, a town needs growth in both business and population. Our housing stock is a huge attraction for potential residents and businesses. It's available. It's affordable. And, it's beautiful. Our wonderful historic buildings are why we moved here and it's why we bought here. Anyone who has traveled around this country much knows that not every city has the wonderful (and largely contiguous) historic architecture that our Northern Kentucky "Cote d'Azur" has. This historic housing stock is really a gem. It's also a gem that helps increase our tax base and our tax revenues.

In fact, when one stops to think on it, what is our town WITHOUT all of our wonderful historic architecture? I'll tell you what it is: Just another small, undifferentiated town deriving it's meaning from the 2nd tier city across the river. Yuk!

There's a reason why historic architecture has value--not everyone has it. And, once it's gone, it's gone. You can't replace it. It is, in economic terms, a dwindling asset. It will only become more rare and large pockets of historic real estate are, and will become, even more rare and more valuable. So, what we've got makes us special now and if we can keep it, it will make us even more special going forward into the re-urbanization of our region.

So, yes, we do need a dedicated, full time, historic preservation officer if we intend to keep this city a worthwhile place to live. This isn't just about esthetics, it's also about keeping our town economically viable. Fortunately, our HPO is quite good. She has a passion for history and architecture, a deep knowledge base, and a desire to help residents do the work necessary to save and preserve our properties. She is personally and substantially invested in our city. I have personally found her to be generous with her time and resources. We're very lucky to have her.

Friday, May 27, 2011

Not Chamomile? Nope.


When Beth came over last week to take pictures of our home, she pointed at a bunch of flowers, growing in a 2' bush like clump, and asked, "what are those?"

I matter of factly regurgitated what I had been told that they were.

"Chamomile."

She looked at me quizzically and asked, "Are you sure?"

To which I promptly responded something in the overly confident affirmative.


Which of course, got me wondering.
And researching.


This (above) is Chamomile. This is not what we have.

And now, you know what? I have NO IDEA what our plants are.

So, if you've come to my garden in the past years, and you've been happily handed a clump of potted flowers with the assumption that you've gotten this lovely smelling chamomile.... please don't make any tea out of it until we figure out exactly what this sucker is.

Composite flower head, multiple (layered) bracts, alternate lobed leaf arrangement on stem. Plant height approximately 2 feet tall. Bushy in nature. When crushed, stems, leaves and heads smells faintly of menthol. Pleasant smelling.


I'm starting with the Aster Family.
Only some 5000 more plant identifications to look at.
http://www.wildflowers-and-weeds.com/Plant_Families/Asteraceae.htm

UPDATE: I think I found it. Could this be Feverfew (Chrysanthemum parthenium)?? If so, don't make tea out of it if you are pregnant -- but it's ok for a headache. --Whew!


Thursday, May 26, 2011

$37,500 FINE PER DAY!

(uncredited photo from Fine Homebuilding)

As some may remember, I'm the certified lead-safe work practitioner here. I've made other posts on the matter and my position is that you don't need to freak out, but you have to use some common sense and a modicum of care.Link
Obviously, I'm not going to get hysterical when others don't do it perfectly, and I generally just warn folks who aren't doing it right to clean up before hugging kids and to keep their kids out of their dirty truck, don't dry sand, and the like. Adults are harder to hurt with lead. Kids are all too easy. So, besides worrying about the kids, I'm pretty mellow with regard to contractors not under my watch, but it really rankles to see folks pretending to be qualified to deal with lead paint while subjecting everyone including neighbors to unacceptable amounts of lead dust.

It looks like the hammer is coming down, finally. I have mixed feelings about level of the fines, but it is very much time to stop giving these guys a free pass.

EPA Nabs First Lead Contractor

I guess what I'd really like to see is for the EPA to have more realistic and meaningful standards and then do more enforcement on egregious malfeasance like this (using electric sanders on the outside of the building without any containment).

The downside of draconian EPA enforcement measures (as you may see in the comments on that blog posting) is that no contractors will work on older homes, or when they do, they either charge an arm and a leg, or they simply remove lead painted trim (or have it removed in the dead of night) rather than strip it--killing the historic charm of yet more buildings and perhaps creating more, worse health problems.

So, Good on the EPA for hammering a dangerous violator but now it's time to loosen lead clearance standards, firstly--they're meaningless now-- and then encourage compliance with best practices without using fear and intimidation for minor infractions.

Tuesday, May 24, 2011

The award.

I want to thank whomever nominated us for the Covington Preservation Society Award thing we went to tonight. I'm sure someone meant well, and we both thank you for your intent... but please, next time-- please don't.

We did not build this home from the inside out for anyone but ourselves. We designed it from scratch, built it with our own four hands, and we had hopes that others would follow in our footsteps. That's the reason we created this blog- to inspire, to help, to advise, and above all-- learn from our mistakes.

We did not rehab our home in order to meet any requirements other than our own use and enjoyment, so an award is not necessary, but more importantly, an award wherein the sole intent seems to be to showcase the Historical Society's disappointment at our inability to 'restore' our home to some historical standard, (when we bought our home it was, as you can see from this blog, a total mess with NOTHING to preserve) and therefore to present us as a sub-standard disappointment was humiliating.

To explain - the other 'Historical Renovation Award' recipients were photographed beautifully, special care taken to show the careful paint choices, the woodwork, and of course, the decor. Ours? We got a great photo on the front of our award highlighting the chain link fence we have yet to replace with the wrought iron one in the back yard. Any pictures of the corbels we spent days researching and painting? The hand made sills, the stone work?

Oh, and the picture of the spray foam installation. Yeah, THAT was a keen choice to present to the Historical Preservation Society. Ugh. I was so embarrassed. It only served to remind me of just how much more we have to do, and that this is an ongoing process.

That's ok, I guess- I knew that going in.

We have only tried to improve this community- and dammit, we have done more for our community than most. We INVESTED in it. We LIVE here.

She may be rough on the edges, she may have a lot of work to do, but we built this house from the inside out, and I, for one, am proud of what we have accomplished so far.

I hope we get a few more folks like us in the neighborhood. Galt knows we could use someone new to borrow tools from!

Deep breath.
All is well.
Deep breath.
Back to work.

Monday, May 23, 2011

Stair Trim-- partial finale.

Well, it's been a while and I have been quite remiss on updating the blog. Lots has happened.
For one, we are still undecided as to whether our next endeavor should be an arc or not. There's two of us, the two cats, and then there's the 40 days and nights of rain we've been getting in the region.

Needless to say, it hasn't been much of a Spring, and any moment the sun pokes its head out, I try to get something planted in the garden before I sink into the mud.

The weeds are absolutely thriving. We're nearing an all out man v. weed war here.

The good news is that when it's not raining, I can yank out the 16' trim boards out of the house and into the yard so I can work on the trim for our lovely 1st floor stair trim.

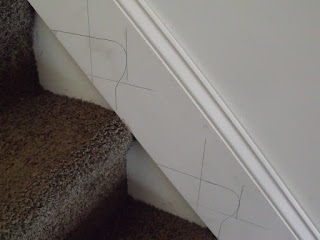
I started planning this last year, but never got up the courage to tackle it. See previous head scratcher here.

I originally thought I would have to use some sort of a large compass to draw the uneven stair treads onto the 16' trim board, then cut it out. I even built a compass out of dowel rods and wing nut screws. Turns out that was an exercise in futility.

Who says I don't get any exercise any more, eh?


Nah, I started out the old fashioned way.

I put it off for a year.


I started taking measurements.. enough to realize that this wasn't going to work for me. None of the steps were even enough to even think of a template. Non starter.

So I decided just to make ONE step, then see how OFF it was from step to step. AT least that would give me a general idea of how much I needed to tweak the layout.


After cutting out a general template that 'mostly' fit all of the steps, I nailed a16 footer to the wall to make sure it wouldn't move, then used the template, a straight edge and a level to mark the horizontal tread level and the nose of the step. Once I had these marks, I could adjust the template to get a pretty good generalization.


We decided to have a 2" relief of the trim (measuring 2 inches in from the top edge at a 45* angle). This determined where the nose edge and tread marks were made.

Then the cutting.


I cut out the steps rather gingerly. I'd rather cut away too little and have to pare the cuts down than to remove too much. (BTW, on one step I did cut away too much, but I've got a nifty trick to fix it.)


So after the cuts were made - yes, I cut these in the dining room. Did I mention about the whole rain/arc thing?--


There was one step that was just... well, WRONG. No matter of pushing, nudging or persuasion was going to work.

So, yay for Bondo!!! I measured the gap, mixed the Bondo, pressed it up against the form with a straight edge, and taped it in place while it cured. Once it was cured, I glued it in place, sanded it down and painted it.

You'd never know it if I didn't point it out.


, so now everything's in place, but because we wanted that 2" relief on the top edge, we now have these triangular nooks/holes at the base of each stair. (you can sort of see this on the bottom step of the following picture.)


Easy fix. Bought a sheet of 1/4" thick MDF, cut it into 4" strips, then routered slight bullnose edge onto each side of the 4" strips, then painted them white. Two coats, minimum.

When they dried, I made diagonal cuts back and forth so each triangle I cut was usable in the corners of the stair, with a long bullnosed hypotenuse.

N.B.: not all of the triangles were right angles. I started cutting them all the same and then realized how foolish that was. I used one right angled piece as a template, setting it in each step to check the fit, then cur a whole bunch of 92-96* angled triangles for the uneven steps.


Then when it was time to nail everything in place, I cut a small square of MDF out of the trim board scraps, and placed the 1" cut square in the hole, then nailed the covers in place. Viola.

But, before that final step, there was the issue of how to cut the angles at the top of the stairs and the bottom.

I did a lot of research and never got a really good answer, so I made one up myself.

First of all, I had left a little room at the top of the 16' trim board to play with. I used a straight edge to extend a line from the top edge out past the end of the board. Then I pulled it out of the way and placed a trim board along the floor in the hallway where it would necessarily intersect with the stair trim.

I drew a line out from the top of that board until it intersected with the line from the trim. I then marked it with blue tape. I then drew a line with a straight edge from the TOP edge of the blue tape intersection top the bottom edge of the blue tape, and then extended the line down to the floor. That was my bisect line.


Then I eyeballed what looked to be a good wedge size for a transition piece, and measured out equally from the bisect line, then drew a line from each measurement down to the center bisect line at the floor. I traced this on to a piece of paper, then transferred it to a piece of floor trim, cut it out and used THAT piece to draw my cuts on the floor trim board as well as the stair trim board.


Then nail into place, caulk and paint.

Oh yeah, remove tape. Heh heh.


At the bottom of the stairs, I took a slightly different approach, but used the same blue tape. Once the base of the stair trim was cut so that the long 16' board could fit into place, all I needed to do was figure out where the horizontal board would intersect, then cut both boards at the intersection. This time, no filler piece is needed.


This one was a lot easier than the top. But now it's done!!


Oh cr@p--- now it's on to the second floor stair trim going up to the third floor.

It never ends, does it?

Monday, April 18, 2011

I'm Sorry....


To the man who was hired by the City of Covington to mow the lawn next door: I'm sorry.

The Day lilies we planted two years were so gorgeous, the soil that we tilled and fertilized so productive, the beauties that have been painstakingly growing in our yard have simply multiplied and thrived.

I have been watering and fertilizing them in anticipation of carefully splitting the bulbs and replanting them in carefully chosen locations throughout our small neighborhood of Seminary Square.

Perhaps you remember.... you were here today. I'm sorry I missed you.

I am really REALLY sorry I missed you.


You see, my husband and I carefully dug up over 200 bulbs this week. We planted about 90 of them in the back yard of our next door neighbor's house; a house that will soon be remodeled by the Covington Center for Great Neighborhoods, and then hopefully purchased by a family who loves gardening, and yes, even daylilies.

It was a 'pre-gift'. A way to let the new neighbors, whomever they might be, know that we're glad to have them in our neighborhood. We bashfully thought it might be a way to encourage folks to take an interest in our little developing chunk of Covington.

That's why we carefully replanted the lilies in their yard, heaving many 5 gallon buckets of fertilized water over to make sure that they could rough out the transplant, and maybe (just maybe) bloom in a month or so.

I know they're hardy, because this is the time of year we transplanted them into OUR garden two years ago, and they bloomed for weeks and weeks right out of the gate.

We spent HOURS digging, splitting, moving, digging, watering.... and then it rained right on schedule. It was perfect. Two days later and you couldn't even tell they had been stressed. It's why I like to spend careful attention to not bruising the leaves... to gently tug apart the bulbs instead of chopping them, which works just fine, really, but the lilies do tend to get droopy and there is a level of casualties with that approach. I didn't want to waste a single bulb. :-)

The last two days I'd been checking out one of our windows and looking over at them like a proud mama... but I digress.... I wanted you to know that I'm sorry.

I looked out the window... sometime after you had left the scene.


And you know what? I'm sorry you left before I could put my left foot up your backend for what you did, you horrible excuse for a "lawn care" employee.

I swear if you showed back up right now, I'd be in serious trouble for taking a shovel and smacking some sense into that fart-sniffing jerkmuppet tadpole brain (do I assume too much.... perhaps) of yours.

What the heck were you thinking? Or is THAT presuming too much as well?


What took me three or more hours of careful thought and planning, you mauled in seconds, you idiot dirt jockey.


Seriously, the freshly, carefully turned soil didn't give you a clue?

What? The tall healthy plants reminded you that you hate your job, your life, and the people you meet everyday?

You should know that I really don't like you.

I don't like lazy, stupid people in general, but your willful idiocy just tops the cake. You are the Pièce de résistance of idiot savants.

Without
the redeeming 'savant-y' part.


I'd love to find out who you are and ask the City of Covington to terminate your employment contract. There are plenty of decent folk who need a job and can tell the difference between a 1" blade of grass, and a 2 foot tall day lilly flower bed.

And by the way--- the grass was already short-- what the heck were you mowing over there?!?


Personally, I'd rather someone else have your job. Obviously, you don't want it.My rationale is that anyone that stupid is bound to do something far dumber, and dangerous, and perhaps should not be in a position to handle flammable liquids.


Not as long as I have a match nearby, anyway.

Tuesday, April 5, 2011

Adding to the List


The wildlife list, that is.

We are in the city, just a few blocks from the highway. Just 10 blocks and a river (walking distance) from Mike Brown Stadium. Yet we get a surprising variety of creatures in our little postage stamp of a back yard.

We've posted our list before, and today I need to add a few birds to the list. The first, is a first for me, too. Today I saw an Eastern Towhee (picture above) for the first time.

Here are our additions:

Cooper's Hawk
Red shouldered Hawk
Tree Sparrow
Song Sparrow
White-throated Sparrow
Chipping Sparrow
Eastern Towhee

The entire list:

Canadian Geese
Mallard Ducks
Turkey Vultures
Red Tailed Hawk
Bats
White-footed Mice
Grey Squirrels
Opossum
Raccoon
Chickadees
Mourning Dove
Rock Dove
Downy Woodpecker
Robins
Junko's
Grackles
European Starlings (invasive)
English Sparrows (invasive)
Chimney Swifts
Blue Jay
Garter Snakes
Crows
Carolina Wren
Cardinals
Brown Thrasher
American Kestrel
Rose-Breasted Grosbeak
Mocking Bird
Tree Swallow
House Finch
Goldfinch
Great Blue Heron
Northern Flicker
Ruby-throated Humming Bird
Sharp-shinned Hawk
Red-headed Woodpecker
European Wall (Lazarus) Lizards
White Crowned Sparrow
Cooper's Hawk
Red shouldered Hawk
Tree Sparrow
Song Sparrow
White-throated Sparrow
Chipping Sparrow
Eastern Towhee

Thursday, March 31, 2011

Water Out of the Wall


This blog post is timely. Alas, I was in a hurry so I didn't take photos, so I'm using the video and graphic that I've found on the web.

Here's the scenario:

First nice day after a long cold winter. I see the hose is already attached, probably from that last warm snap in December or January when I hosed off the walk. I turn on the spigot. Hmm, no pressure in the hose...WHOA! There's water squirting out of the wall! Not good. I kill the water. I feared a broken pipe, but since the water only came out of the brick wall when the spigot was turned on, it seemed doubtful that I had a broken pipe.

A quick trip to the basement confirmed, but I turned the water off to the spigot anyway. Now, to fix...

Evidently, the spigot is called a "sillcock". The sillcock is actually a lot more than a faucet, as it is a mechanism that extends from outside the house to inside the house, with the valve actually inside the house. As a result, when I left the hose attached and the water froze and expanded, it blew out the sillcock and not the pipes inside. That was good.

So, we needed a new sillcock. How big? Well, first we remove the old one and see what we started with. Most plumbers sweat the sillcock directly to copper pipe. So, in order to get it out, you're going to need to un-sweat the pipe (break out the creme brule' torch), or cut it. I decided to cut the pipe. I've never sweated a pipe before.

Cutting the pipe as close to the wall as possible gives you some flexibility. You can use the same size silllcock and cut the existing pipe back and then sweat in another length of copper, or you can use a larger sillcock and then just cut the pipe back to fit where the silcock terminates.


The above video shows pretty much the same silcock failure and the repair is pretty good, too. I did mine differently.


First, I suspect that modern sillcocks fail with a frequency that suggests that one plan for replacement. Since I don't want to learn how to sweat pipes and anyway I didn't want to sweat the pipe to the sillcock, I needed to come up with an alternative.

Enter SharkBite fittings. It's a "push into place" fitting. No glue. No flux. No solder. You can join copper to copper or cpvc or pex. The fittings allow you to add a male screw or a female screw end fitting. Just measure, cut, deburr and emery board and then press fitting to pipe and you're done! And, you can undo your work with a $0.50 plastic tool!


So, since the sillcock I bought was 14" and had a male screw end, I was going to have to cut the pipe back and affix a female threaded end fitting. This would allow me to simply UNSCREW the sillcock if I needed to repair or replace. No unsweating. In goes the sillcock into the existing hole.

So, since the SharkBite female threaded end added roughly 3/8" to the pipe length after being installed on the pipe I marked the pipe 3/8" back from the end of the sillcock. Then I used a pipe cutter to carefully cut a nice clean end off the pipe.

I then deburred the pipe and took some fine sandpaper to the pipe end, inside and out. Then I wrapped the end of the sillcock with Teflon tape, 3 turns worth. From there I threaded on the female SharkBite fitting. Make sure you get this tight when you do it, or you'll be leaking.

Next comes the fun part. Go out side and make sure that the sillcock is facing the right way. Pull it out a little from the wall, and then apply a generous bead of caulk all the way around where the collar meets the wall. Slide the sillcock back flush and hopefully, you'll be able to use the same screws to screw the sillcock back in place.

Go back in the basement (or inside). There should be about 1/2" overlap of the SharkBite fitting over the copper pipe. There should also be a bit of give, allowing you to push the pipe back a bit so that you can slide it into the fitting. Once you negotiate the pipe into the fitting, push them together firmly.

Now comes the moment of truth! Close the sillcock valve and turn the water back on. Look at the fittings closely. If the screw on fitting is leaking, you're going to have to take it apart again (use that plastic tool), re-wrap the male fitting, and then screw it on TIGHTLY. Do not just try to tighten it without disassembling. You stand a chance of screwing things up royally if you do. After re-tightening the male/female connection, then slide the copper pipe back into the SharkBite connector snugly. If you have no leaks, you're done!

Next time, remember to detach the hose at the end of the season.

Monday, March 14, 2011

Lettuce Box


I got this idea some years ago from Matt Madison, when he was growing his own greens for Findlay Market. The idea is to build a long box up and away from slugs and at a height that you can easily reach and a size that you can easily work in.

You can plant your greens rather densely and in several courses (I divide the box up into zones and plant each zone a week or so apart so that I have a near-never-ending supply of fresh greens to harvest. You can also create custom blends, which is worth it since you don't have to worry much about losses due to slugs. I've mixed beets and swiss chard into my greens mix before. The baby greens are very nice.

You should also amend your soil with some minerals to improve the flavor and nutrition of your greens. I'll be adding some "green sand" to mine.

I've used Pressure treated lumber here, as they no longer put arsenic in it. If you're still uncomfortable, you can use non-PT lumber, but you'll want to brush the boards with mineral oil to preserve them.

Here is the recipe:

2 saw horses. I'll leave it to you to buy or make them. Just make sure that they are waist high, as you want the box to be high enough so you aren't bending.

For the Box:

2 1"x10"x6' Pressure treated boards

2 1"x10"x27 1/2" Pressure treated boards

4 2"x4"x26" Pressure treated boards

4 2"x4"x6" Pressure treated blocks

42 (at least) 2" treated deck screws

8 (at least) 1 1/2" treated deck screws

For the bottom

1 8'x26" piece polycarbonate corrugated roof panel (metal will work too)

4 closure strips (wavy roof panel supports)

Cut the corrugated roofing panel to size with a circular saw (use a finish blade, if you can--make a test/practice cut first off the end). Measure and make sure it is exactly 6' or slightly less. If you're much off, you'll want to adjust the lumber sizes. Cut all your pieces lumber to size per above. Try to be exact, as it will make for a more sturdy box.

Next, attach the 26" 2x4 cross-members to the long 1x10x6' boards with the 2" screws. Start with one at each end and then 2 24" from each end. The 2x4's should be flat and you should screw through the 1x10 into the ends of the 2x4's. 2 screws each side should suffice. EVERY hole should be pre-drilled. 1x10's tend to split easily.

Screw the end side 1x10x27 1/2" panels to the side cross members with 5 screws. Again, pre-drill every hole.


You should be able to set the box on your saw horses unless you are making your own legs. This will make the next step easier. Center the 24" closure strips (wavy supports) one on each of the cross members. Set the corrugated roof panel into the box so that the sides of the panel curl up, not down. The fit should be fairly tight and the panel should rest on the closure strips.

Reach under the box and feel for the closure strips on top of the 2x4 cross members. If they are reasonably centered, use 2" screws to fasten the panel in two places to each cross member through the closure strips. You should be able to eyeball this and feel to confirm that you are drilling into the closure strip. You want to drill through "high points" on the roof panel so that you do not over-penetrate the cross member.

Attach the 4 blocks to the corners using 2 1 1/2" screws each to the long 6' panels first. Make sure the blocks are flush with the top of the box and the end of the 6' panels. Then, screw the end panels to the corner blocs with 2 2" screws each.

This should be a very sturdy box. Before putting dirt in the box, you'll want to drill some holes for drainage. I used a 5/16" spade bit. I put a hole in each trough at each end, and then a few alternating holes toward the middle, just in case. See the pictures below.


Close up of the end holes.

Monday, January 31, 2011

Hawk.... not a hawk.


We've been seeing a lot of hawks around lately.

Red shouldered Hawks, Sharpshin hawks, well fed hawks.

We've been seeing them in our backyard for a few weeks now; so much so that we've gotten to pointing them out according to their locations as "He's in position one." or, as in the picture here at the top of the blog post, 'position two."


Or sometimes he just gets in close, ready to pick off any slowpoke doves or distracted Starlings.

They're incredible beasts, huge birds, glorious gracious creatures.

So, recently I've gotten so used to seeing them around that, today, not more than ten minutes ago, I looked up suddenly from my laptop, having seen something in the corner of my eye.... and said to myself, "Ooooh, he's diving!"

Well, he wasn't.


Dumbass.

Tuesday, January 4, 2011

Just bought 2 fireplace mantels

Two matching wood mantels from a 1910 home off of Riverside Drive in Cincinnati for $100. They need cleaned up and a coat of paint, but I'm liking what we got.

Problem is we only need one, so I'm racking my brain for a place to install the second one!

Pics to come!