Wednesday, April 24, 2013

Hoop houses made easy

It was brought to my attention that someone couldn't find a post on our hoop houses... and neither could I. Could it be that I never posted pictures? Yeah, it's possible.

Shame on me.


Two years ago, DH built a lettuce box (post here) and did a darn good job of it too. It's doing incredibly well.... but I made a few minor adjustments and added some increased functionality, like having the seedlings survive an early frost.

I turned it into a hoop house, and it was cheap and easy to do. Now not only does it keep the seedlings from frost, but it keeps them warm, keeps the moisture in, keeps the weeds out, etc.

First of all, like any good project, it's a reason to go to Home Depot.

What I added to the lettuce box was  pex... sharkbite flexible plumbing tubing. The tubes are 1/2" pex (about $3/10' length) I cut them down to 5' lengths for the lettuce box and attached them using 1/2" plumbing clamps.

Then I bought a 3/4" length of pex to cut in to smaller pieces for the clamps. I checked at the store to make sure that the smaller pipe would fit inside the larger pipe... I recommend doing this if you decide to use different sizes.

For the 3/4" pipe, I tried several different sizes and lengths, and depending on whether you want your clamps to be hard or easy to remove, you'll want to have enough tubing to experiment. I've found that what works best for me is lengths cut on the circular saw in about 2" lengths, then use a box cutter blade to cut a straight slit down the side, and then a second about 1/4" away .. .. and it's not as easy as it sounds. Once the first cut is made, then you make the second cut.. to end up with a 'C' shaped 2" bit of tube.


Then the plastic: we had some leftover 6 mil plastic from either the water feature episode of the rehab or from various paint jobs around the house, and I started with that.

I wrapped one long sheet over the top of the hoops and used the clamps to hold the plastic in place. Works like a charm.


Then whenever we want to get to the lettuce (arugula here) we just pull the clips off and pull the plastic back.

In fact, it worked out so well that I went full scale on the raised beds as well, but instead of using 5 foot lengths, I used the full 10 foot length for the maximum height.

x


Another difference is that I decided to use clips that were harder to pop off (at first, when we got a strong storm, the smaller clips could get popped off from the plastic. I got tired of that, so I used longer pieces and smaller channel cuts that held better.

Because the clips held better, it was easier just to install a zipper, the kind used for drywall containment areas. (Find them next to the 6 mil plastic at the store.) MUCH easier than popping off the clamps and then reinstalling them afterward.

I also used three separate pieces of plastic instead of just one, as for the smaller lettuce box. One large sheet across the top and two smaller squares for the rounded ends. I just clamp them all together as shown in the image above.


The best part of it is that when it gets warm enough, I remove the plastic and replace it with a 25% shade, permeable garden cloth which I have sewn into a full Quonset hut shaped cover. It's one solid piece and allowed me to grow cucumbers and zucchini for the first time in years without having the cucumber beetles kill the entire crop.


It took me hours to hand sew in place, but I guess it was worth it considering the results.

Friday, April 19, 2013

Front garden pics... and a foundation leak?

Tulip  bulbs are in and almost blooming, and we've got Dusty MIller, a yellow poppy, lithodora (tiny blue flowers), a purple Columbine, a few seedums, and a ton of purple Irises.


The Irises will probably take longer than normal to bloom, seeing as how they've just been transplanted. I was a little rough splitting them apart. They were VERY compacted and in a bad way.


Tulips and seedums ... oh and bugger me Elmo if the picture on the flat of tulips didn't say "RED TULIPS". These look decidedly pink.

I am not a 'pink' kind of person.


I have wanted this for so long.  Yay, me.

More to come.... 

Oh, and btw, we had our first big rain (read: I watered the #@&^ out of the garden after I installed the dirt, but before I planted the flowers) and it leaked water from the outside of the house into the basement where the old coal chute used to be but was 'sealed over' long long ago in a galaxy far far away.

Not a puddle, but moisture. Enough to be a concern.

So before I put the flowers in, we dug up the dirt right next to the house, and out about 3', in a slope away from the house. We tacked in some 6 mil plastic sheeting, and laid it on the slope as to divert water away from the foundation of the house. Then we used concrete adhesive and glued it to the house, cutting it off a few inches above ground level so you can't really see it at all. 

I'll let you know how it goes.


A funny thing happened on the way to the garden

last year I bought a lion statue for the garden.

What I wanted was this gorgeous beast, weighing about 2000 lbs. and so far out of budget I couldn't even pretend to wave a credit card at the website with a straight face. Not gonna happen.


So what I ended up buying was this guy (below), about 3' tall for $40, made of plaster. Designed for outdoor use.

Off to the garden you go. Shoo.

Then winter came, and amazingly, our lion statue held up rather well... until Spring, and the sun shifted in the sky.


You see, it all started with these crappy old windows we had stored in our basement. We kept the ones that had the glass intact, I'm really not sure why. I guess we had fantasies about fixing them up. But you know me, I can't let anything go to waste. I'll eventually make something out of it.

And so I did.


So what I ended up doing was taking the glass out of the windows and painting the sashes white, then I ordered a couple of sheets of mirrored plexiglass to replace the glass with.

I used a box cutter to cut the plastic sheets to fit in between the muntons (divided light wood pieces) until someone told me I could use a reciprocating saw. Then I went straight for the circular saw and made my life a lot easier.


I bought the sheets here, btw:
http://www.estreetplastics.com/Plexiglass_Acrylic_Mirror_Sheets_1_8_thick_s/38.htm

Once I had the plexi pieces cut, I caulked them into place and used small tacks to keep them in on the backside of the sash. Then I hung them in my garden. This one is on the East side of the fence.


Well -- whilst I was trying so very hard to cut the mirrored plexiglass exactly to fit, I didn't really leave a whole lot of room for expansion, and therefore not only was it a tight fit putting the plexi into the sash... but as you can see from the picture above, the mirrored surfaces became... well, somewhat CONVEX in nature.

Did I mention that I hung the window on the east side of the garden wall... so as the sun set in the west, the sun's rays would hit the mirror, and the mirror would throw off a fist sized laser of light on to the ground in front of the window, and as the sun set, the laser would move across the yard slowly from east to west.

In case you're not getting the picture, here's pretty much how it worked out:


Two guesses as to where I placed the lion statue.

And you got it on the first try, good for you. Right in the path of the @#$%^&* laser.

So last week I was noticing all of the white shards of... well  . .. . something all over the ground. I hadn't really noticed them before, but I'm in full on garden mode, so let's just take a peek and OH MY GAWD I HAD EXPLODED THE LION'S FACE OFF and blown his body into bloody bits all over the place.

Of course it took me a few days to figure out what had really happened.

At first I just thought, 'Well that's just what you get for buying a crappy $40 lion and putting it outside all Winter. It just fell apart.....'   But a few days later I was weeding around (what was left of) the lion, and suddenly something HOT lit on my hand.

I dropped my digger and looked at my hand. Nothing there. 'What the....?"
I picked up my digger off of the ground and there it was again... "Aaaagh!"
I stared at my hand-held digger like it had suddenly come alive and was poking at me.
I was about to have a very terse conversation with an inanimate object.

No, self-- don't be an idiot. Too early in the season for that. No, this was something else altogether. Recreate the scene... and oh yes, there it is... the 5 o'clock laser beam just as it was climbing up the side of the lion statue.

And that's when I realized that all winter long, as it was freezing cold outside, as the hot convex laser creeped its way up the plaster, warming pieces of it in fist-sized chunks... they expanded and POP! off they went. One shard at a time all over the yard, extending the carnage about 2' around the lion.

My poor, tortured lion. 


Anyone know how to make a plaster eye patch? (Maybe out of Bond-o?)

hah. I kill me.

The amazing things you find at Home Depot.

Ah yes, getting back into the swing of things means, of course, more trips to Home Depot. It's so nice to walk into a place where everyone knows... your name. Cue music.

So, purchases made and walking back to the car.... when I spotted something truly me-ish. My future car.
Yes, I love you, too.

Silver Shadow, we were meant to be together.


So, who ever you are with the magnificent Rolls Royce in the Crescent Springs Home Depot parking lot: I'm the one who put the post-it note on your car that said, "I love your car." And I meant it.

Now sell it to me.

Friday, April 12, 2013

Fences Fences Everywhere


Oh how I'd love to have the fence above, but alas... it's not going to happen. I've spent a lot of time looking around at what others have done as far as perimeter fences and gates, how they're embedded into stone (or concrete in some cases) and here are a few samples of what I'm looking at nearby in Covington, KY.


I like the one above, it's about three blocks away from us, and although we don't have the stacked stone base under the limestone, I see this as a distinct possibility to emulate.


Hoop and spear, pretty basic... in concrete.


Above, in limestone, below in concrete. Again, all ok as far as I'm concerned.


 Now, this is going to be the part that kills me: finding these end posts. OK, maybe not the one below, but it's pretty darn cool.


Problems we plan to encounter: Breezeway Concrete

The plan to de-horrify what we call the 'breezeway' (the area between the East side of our home and the West wall of our neighbor's house) involves determining first whether or not we wanted to JUST remove the concrete slab in the breezeway, or remove it along with the bricks underneath.

I find it ironic that what I want to have is brick (or brick looking) the way it was originally intended: a patterned brick layout that moves water away from the house. Not too complex a concept, I know. Form AND function.

After we removed the front part of the concrete slab, we realized from the side cut of the breezeway/walkway is that there were bricks still there. The previous owners just paved right over top of the bricks that were there.

This leaves us with the question of, 'do we remove all of it and start over, or do we try to save the old bricks?'

The answer, for me, is: try to save the old bricks. Why?

1.) because I think it would be cheaper,
2.) I like the idea of saving the historical brick, and
3.) I think it looks cool. 

Why not save the original brick?

1.) It may not be salvageable
2.) It might be quicker/easier to chuck it all and use stamped concrete
3.) Herringbone schmerringbone


 Ok, I still think the herring bone could look very cool. The picture above is of the original brick layout with a French drain to the side, keeping the water away from the basements. I'd like to hope we've got something like that under our concrete, but it could just be too much work for the outcome. Decision is yet to be made.

 Here's one of the other issues we'll have to face: the removal of 4-6" of the concrete alone will be a big height adjustment. Just take a look at how far up the bottom step is buried in concrete below. And then there's brick below that.

Can you imagine the size of the dumpster(s) we'll need to remove all of this?

 Oh, and the basement access. Another big problem. We built the base of the basement door (the stone build up) right on top of the concrete. On top of the brick. I figure if we remove the concrete we'll have to demo the stone base and rebuild it 4-6" lower. And we may have to move the electric light switch in there too, because it might be too high once the basement door and frame is lowered.

 And the air conditioner unit.


You can see here the entire breezeway can be seen from the sidewalk, so I'm hoping the City is amenable to working with us on the improvement plan back to the garden.... but there will be a lot of minor changes we'll have to deal with along the way.... and that's where the costs can sneak in.

You can also see how the cracks in the concrete above have expanded and the concrete has sunk even more over the past year since the City tuck pointed and re-bricked the neighbor's west exterior. You can see the new low spot in front of the basement door where we now have water puddling after it rains. (They ran the massive scissor-lift back and forth over the concrete for weeks, not doing us any favours. Heck, that's what started this whole mess in the first place!)

I should probably just plant the front yard with flowers, work on getting bids on the iron fence, and focus on interior updates while we wait for a kind word from the City.  :-)

Yeah.


What is a Facade Grant?


"The Covington Residential Facade Program, funded through the Community Development Block Grant Program, is administered by the City of Covington's Community Development Department. The purpose of the program is to assist home owners with improvement to facades (visible from the public right-of-way) of qualifying residential properties."

"Households interested in participating must submit a pre-application with required information. Households determined to be eligible will then complete a formal application and provide additional documentation." 
                       
- From the seven page Residential Facade Program 2012-2013 Program Guidelines document. www.makecovingtonhome.com

So, what did we do? (besides stop working on our front 'yard' back in April of 2011 and wait for  a grant...) Well, we applied for the grant.

The grant is for a minimum of $1000 and a maximum of $5000 for owner occupied homes, and for rental properties it's a $1000 minimum with a max of $2500, but the owner must contribute a matching amount of funds to the project. Seems worth the effort, eh?

We submitted the pre-application on June 30th, and were told it was on a first come - first served basis. We got to City hall at 8:30 AM to drop of the application.  We were not the first in line. We weren't even the tenth. There were LOTS of applications put in before ours.  We were late and it didn't look good for our possibilities.

And then we waited. 

and waited.

A year later, as you know by now, I said enough was enough -- get the ball rolling without the grant. So phase one is still underway, but mostly done. Maybe installing the wrought iron fence will just have to be phase two.

What's hilarious is that we were contacted by the City Development Program just as we were dumping the dirt into the new front yard.  It took a year to get around to us, but they were proceeding with the grant application process and wanted to meet with us. 

And our documentation.
They wanted:
  • Six months worth of bank statements
  • W2's
  • Last year's tax returns
  • Pension/IRA asset documentation
  • Driver's Licenses
  • Three pay stubs
  •  and a copy of the deed to our house
Once they establish that we meet their requirements, they will then drop by to find out what we plan on doing.   We'll let you know how that goes in a few months.

Until then, I'll be attempting to outline the plan here, as well as get estimates on the cost.


Covington Facade Grant...and a front yard.

So why does a facade grant put things on hold? Well, because you suddenly stop and think, 'this was going to cost a heckofalot of money... if the city is willing to help us financially to do the work, shouldn't we try for it?' and then, unfortunately, you stop thinking about putting your own time and money into a project, when the city just might offer you $5000 to do the project.

I mean, they're not going to reimburse you for what you've already done, so why continue?

Here's why: Because we stopped the project and it's a year later and I just couldn't take the 'front yard' looking like a horrid mess for one more week. We've waited a year for the city to process the grant application.

It's still in process.

So the moral of the story is this: if you're going to do it, just do it. Nothing is free.

-------------------------------------------------------------------

Back to the story of the front yard :

So in the Spring of 2012, long before we started whacking away at the slab, or even thinking about cutting into it, we received nine huge blocks of historical limestone. Nine very heavy blocks of limestone from Covington homes, that had been demolished for various reasons, but had the fancy bits (mostly front steps, we believe) saved for posterity. Or in our case, it just saved our posteriors.

It took four trips and four guys to move them.

And maybe a new shock absorber or two along the way for a neighbor's truck. (Thanks, Terry & Daniel!)

Six were stacked on 2x4s, and the other three were lackadaisically strewn about the walkway. (I think we planned on some temporary design, but when we discovered just how hard they were to move, we just left them there to the side.)


Now, you have to realize that although they were all approximately 42" in length and had one side measuring 8" wide, we did have a six footer length one, and they all had varied depths. We easily determined that the 8" side was the commonality, and that would be the width of our limestone boundary. Then it got tricky.

The plan was to dig down around the perimeter of what was the slab about 10", lay down about 6" of gravel, and place the limestone on top. This was to help prevent heaving over time.

The problem was that from the East to the West, the property line next to the sidewalk dropped about 6" over 15 feet. This means we needed to adjust the digging depth so that the tops of the limestone steps were level all the way across the front... after all, we are going to install a wrought iron fence on them (eventually).

Part two of the problem was that, as mentioned previously, the depths of the stones varied from 9", 9.5", 10", 10.5" and up to 13" on the six-footer. So not only did we have to compensate for the slope of the ground, we also had to compensate for the varying depths of the stone.

So I set up a level line based upon a predetermined low point, (which was actually determined for us by being a massive piece of concrete we just couldn't remove) numbered the limestone steps with their measurements, and set a deadline for the stones to be moved.

The deadline was March 30th. Meaning, the stones got moved by 3/30, or DH was dead meat.

The last week of March, the digging had begun. We had .9/ton of gravel delivered for $64 from Ideal Supplies, Inc. in Ludlow, KY. We laid out a tarp on the sidewalk, and the driver nailed it perfectly. We also had six 40# bags of dry concrete mix delivered as well. As a last minute thought, we decided to use concrete mix as a small particulate leveling agent on top of the crushed limestone, which will hopefully also prevent partial heaving and cracking down the road.

BTW: it was way too much gravel. We used about .6/ton and gave the rest away on Craigslist. (and while I'm off on a tangent here..... when someone places an ad on Craigslist for free gravel, you are NOT supposed to then steal the tarp it was sitting on. That was just mean.)


We started with the biggest 6' block, moving the blocks with long orange arm-brace moving straps we'd seen the guys use on 'Ask This Old House'. We started on the far west side of the house and moved around to the front, making sure each varying depth matched the level line at the top of the blocks. We used a 2' level for the long length level, and a 6" level for the side to side leveling.  Each block needed minor adjustments, but it helped to level the gravel and dry concrete mix as much as possible before placement.

Oh, and before we moved the blocks, I marked each one of them to show which side was the top, and marked them each with a North/South or East/West marking so that there was no confusion as to which way the blocks were supposed to be put in place. With blocks this heavy, you don't want to have to figure it out mid-move.

After a few hours and a lot of water being consumed, all of the blocks were in place.

We decided against placing the last two on the east side of the house right now... eventually they should continue across the front of the house once the rest of the breezeway slab is removed... but that's phase two. For now, we dumped the larger of the remaining blocks in front of the steps, seeing as how it looked a little 'off' now that the slab was gone. 

Eventually, we'll level it and set it on bricks to raise up the height a few inches, but for now... it's in place.

I swooned for at least an hour. DH gets to live. Yay!

------------------------------------------------------------------------------------------

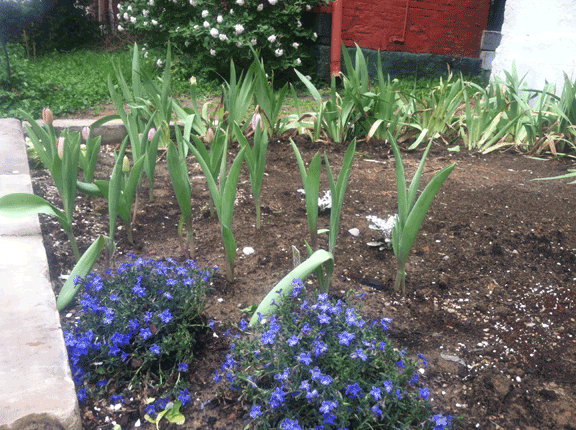
The following weekend I ordered 2 cu. yards of garden soil/mulch mix delivered from H. Haffner & Sons (http://www.hafners.com/) for about $145 delivered. 


Again, I over-ordered, but after moving about seven wheel barrel fulls of soil into the backyard, we were ready to start a garden.


Now I'm looking for a welder to install the hoop and bow wrought iron fence. A facade grant could really come in handy just about now.... hint hint. :-)


BTW:  a/o 4/19/13 -- there's a guy in Clifton (Cincinnati OH) who has dozens of similar pieces of Sandstone. His ad is on Craigslist.


Incredible Beef Stew
(adapted from Tyler Florence's recipe)

I made this for the second time last night and found my version (especially the addition of the tomato paste and Worcestershire) to be so darned good and easy that I had to share. Just give this dish enough time to cook. Making this a day ahead only makes it better. Making a double batch gives you leftovers that make fantastic, elegant lunches or dinners when you don't want to cook.

Ingredients
  • 1T grape seed oil (high flash point) for searing
  • 1T extra-virgin olive oil, for sauteing mushrooms
  • 2 cups all-purpose flour
  • 2 to 4 pounds beef chuck shoulder roast, cut into 1 1/2-2-inch pieces. If there is a bone or some connective tissue in the roast, leave some meat on it and cook it too. You can take it out later
  • Salt and freshly ground black pepper
  • 1 medium-large onion, diced
  • 2T tomato paste
  • 2 cups good quality dry red wine
  • 8 fresh thyme sprigs (or 2t dried)
  • 8 garlic cloves, smashed
  • 1/2 teaspoon ground cloves
  • 2 bay leaves
  • 24 oz. homemade chicken stock
  • 2 T Demi Glace Gold
  • 2T Worcestershire sauce
  • 1T low sodium soy
  • 8 medium new potatoes, peeled and cut in 1/2
  • 1/2 pound baby carrots
  • 2 cups frozen pearl onions, a large handful
  • 1 pound white mushrooms, cut in 1/2 or 1/4 if they are large
  • 1/2 pound garden peas frozen or fresh
  • Fresh flat-leaf parsley, chopped, for stew and garnish
  • 1/2 cup additional dry red or white wine (optional)
  • 2T port wine (optional)
Directions
Cut your chuck into 1 1/2"-2" pieces, and trim any excess fat. Leave a little meat on any bone or connective tissue and save that too. Preheat a large heavy-bottomed saucepan or Dutch oven over medium-high heat with the grape seed oil.
Pre-heat the pan and arrange the flour on a large dish. Season the cubed beef with some salt and freshly ground black pepper and then toss in the flour to coat. Shake off the excess flour and add the beef chunks in a single layer to the hot pan, being careful not to crowd them. You want fond, so you want browning. Thoroughly brown all of the cubes on all sides. If you have any bones or connective tissue from the roast (no fat) brown them too. You may have to do this in 2 or even 3 batches. It's worth it. Remove to a plate and reserve.

Add the tomato paste to the pan and the diced onion. Sprinkle a pinch of salt and stir. Cook for about 5 minutes, stirring regularly. The onion should be soft just slightly browned. Add the wine and some of the stock and bring up to a simmer while you loosen the browned bits. I use a wooden spatula for this. Add the rest of the stock, the browned meat, Worcestershire, soy, demi glace, thyme, garlic, ground clove, freshly ground black pepper to taste, bay leaves and 2 cups water. Pre heat the oven to 350'.

Bring the mixture up to a boil, then cover and place in the oven 2 hours.
After 2 hours, saute the mushrooms in a pan with olive oil, a dash of salt, and a bit of thyme until the mushrooms are lightly browned. Pull the stew from the oven and add the mushrooms. If it has cooked down too much add a bit of water. De-glaze the pan with a splash of wine or even water and add the mushroom fond to the stew too. Dump in the potatoes, baby carrots, chopped parsley, and pearl onions. Taste for seasoning. You may need to add a bit of salt. If the stew tastes a bit tart from the wine, add the port to improve the balance.

Bring back to a simmer and return to the oven for 30 minutes or until the vegetables and meat are tender. Add the frozen peas 10 minutes before serving. Remove the bay leaves and thyme sprigs.

To serve, place the stew in a soup bowl, garnish with parsley and fresh ground pepper. Bread is optional, but you may want it to get the last bit of stew out of the bowl. Serve with a robust red wine.

Thursday, April 11, 2013

I want a front yard. Still.

Oh, where has the time gone?

A whole season has gone by and we seem to be back where we started LAST April. Ugh. We'd shifted a lot of our attention to our facebook pages, and have been keeping in touch with friends and neighbors, but when it comes right down to communicating a story... there's nothing like a blog.

So we're back.

...where we left off. As I said before..... Ugh.

So, I re-read my last post and we were about to start work on our front concrete patio slab.... more specifically, tear it all out. Also in the plan was to tear down the awful chain link fence. The plan also included designs to tear out the breezeway concrete and recreate a stamped concrete (brick-like pattern) all the way back to the garden. It was an impressive (and lofty) goal.

So we did what anyone in our situation would do. We broke up the plan into smaller phases and got to work. Soon after our last post, we clipped the chain link fence apart and chucked it out with the poles for the scrappers. The problem was that several of the poles were embedded in really big chinks of concrete, especially where the front gate was. Not that we didn't expect that; we just cut the other poles off at ground level and planned on using the front gate poles as leverage (leaving them intact) to get those meteors of cement out after the slab was gone.

So, chain link fence gone.

Next : the concrete slab.

This is where pure robust energy and drive got in full gear, got behind me, and kicked my arse.

Ok, since this is intended to be an educational blog, I'll tell you what I did. Coincidentally, I will also be telling you what NOT to do. Kind of clever how it works out that way with me sometimes, eh?

1. First, get an eight pound sledge hammer.
2. Start whacking away at a 30 year old slab of concrete chipping away fist sized chunks of slab until your back gives out.
3. Spend a week with a blown out back unable to move.
4. Then, after a month of healing and relearning to walk upright, you beg your very kind neighbor to help your husband with a rented jackhammer.

My recommendation is to skip right to step four. Needless to say, I barely touched the jackhammer. The guys worked it over pretty hard, and vice versa. It took ALL day, and the slab was only 10 x 18.

To be fair, we did not plan on taking out the entire slab all at once. That was just too much of a project for us and we were not prepared to demo everything. DH borrowed a 12" concrete saw and cut a 10' line through the concrete, effectively cutting our project into 2 sections: the part directly in front of the house, and the breezeway.


Note the large 300# (42" x 8" x various sized) blocks of limestone to the side of the house on 2x4s. Those are intended to be the new base of our wrought iron fence. (Thank you, Rob and BJ Wheeler!)


 Once we had a 2" cut line through the concrete from the sidewalk up to the house, it was pretty easy to determine what had to go. Hence, the jackhammer.


We also rented a 9 cu. yard dumpster for the job, the smallest we could get. It's pretty amazing how quickly concrete can fill up a dumpster. We needed it.


While the guys broke up the slab, I gingerly chucked small pieces into the dumpster. I was still on the mend and no intention of a repeat performance of moronic proportions. We started early and finished late. It was not easy work, but I do know it was a lot easier (and exponentially more successful) than playing whack a mole with a sledge hammer.  It literally took the guys about 20 minutes to bash apart what had taken me weeks to do.


So, after the part of the slab in front of the house was in itty bitty pieces and assembled peacefully in the dumpter... we came across a spot of bad news. There was a lot more concrete buried underneath.

It was demoralizing. 

The good news is that it turned out to be mostly cinder blocks and fence post support base, but those had to be dug out, and broken up, and we needed to return the jackhammer to the rental place (Steffin's Tool Crib on Pike Street) -- but it was still a lot more work than we expected. The old adage of, 'expect the unexpected' was definitely at play here.

We figured there might have been a porch at the front of the house. There seemed to be enough support for it.

It took another week to dig out the rest of the concrete blocks and chunks.

Then we found out about the City of Covington's Facade Grant... That REALLY put things on hold for a while. . . . . .